The Mentornity Admin Guide: Running Your Program
The Mentornity admin guide covers everything a program administrator does inside the admin panel at mentornity.com/admin: setting up a program, inviting or approving members, running matching, defining sessions, scheduling meetings, publishing content, tracking reports, and answering support requests. If your program has renamed mentors or mentees (to coach, entrepreneur, student, and so on), the labels you see will differ, but every step below still applies in the same place.
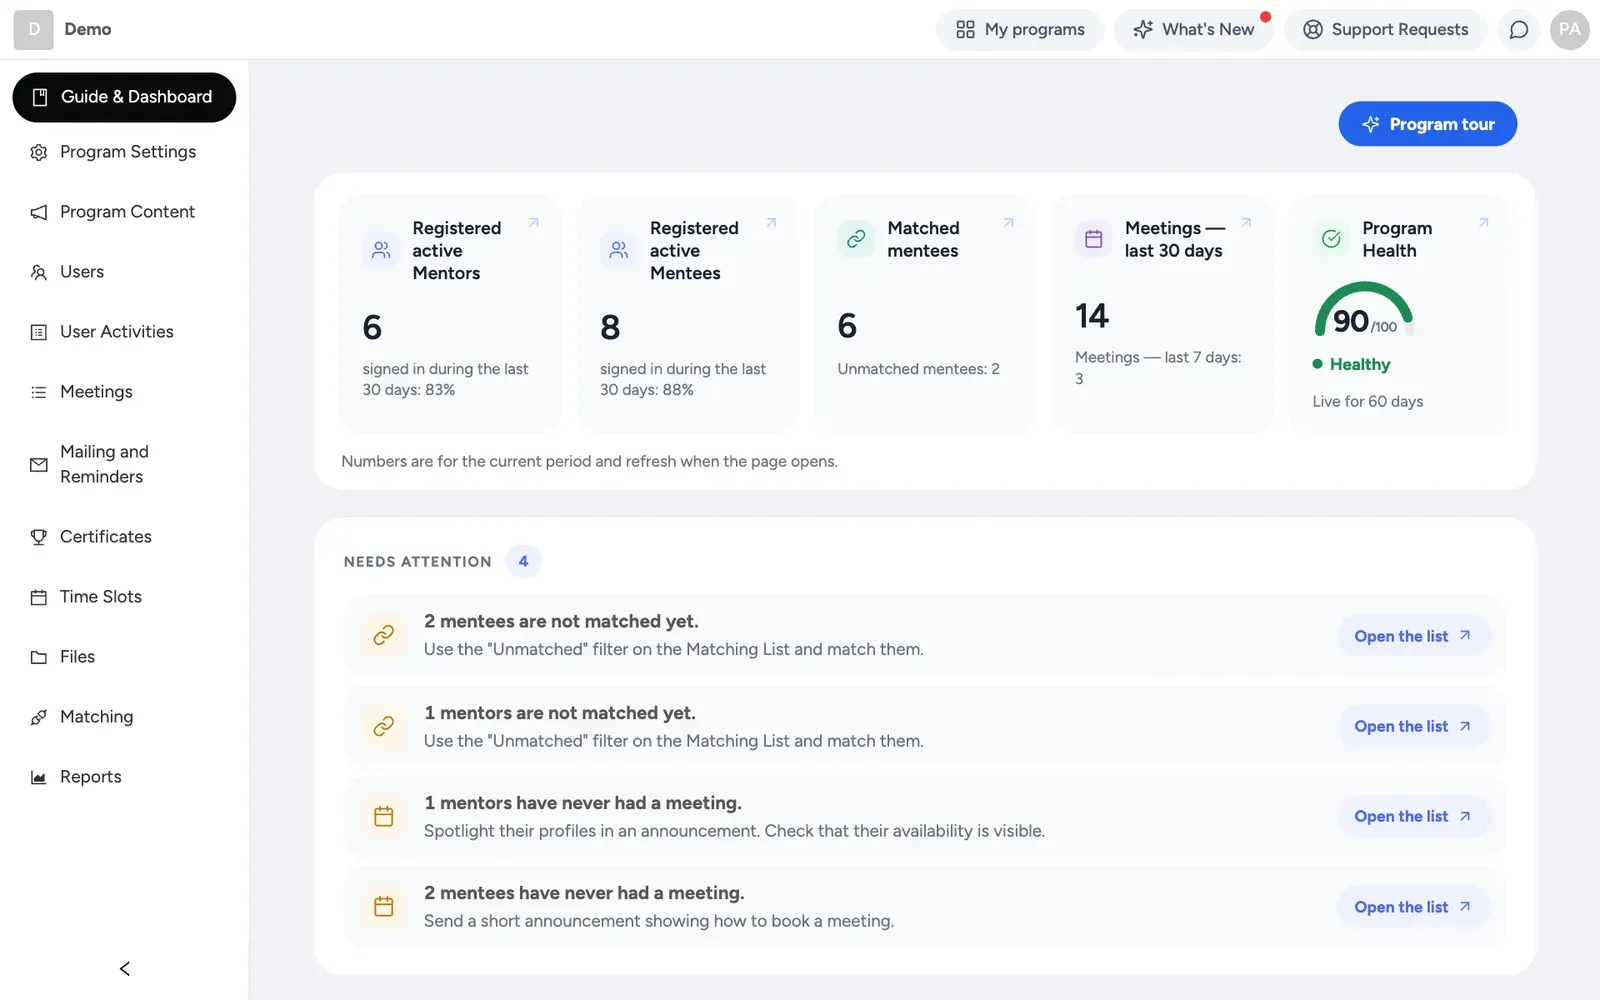
Who uses the admin panel, and what do they see first?
Anyone added as an admin signs in at mentornity.com/admin and lands on the Guide & Dashboard home page. It doubles as a getting-started checklist for new programs and a running dashboard for active ones: a Program Health score, quick links into every other area, and, for new or trial programs, a pinned setup checklist.
That checklist walks through, in order: complete the program info under Program Settings → Program Info; define the profile fields members fill in, from the Users page gear icon → Manage Custom Fields; review the onboarding steps under Program Settings → New User On Boarding, which has separate tabs per role; publish the application forms, if your program accepts public applications; add your mentors and mentees from the Users page (create groups first, if this is a group program); define sessions under Program Content → Sessions, if your program uses a session plan; match mentors and mentees, if your program has matching; and announce the program, ideally from your own corporate email address before sending invitations, optionally with a post inside Mentornity.
The rest of this guide expands each of those areas, plus the ones the checklist does not cover: meetings, messaging, reporting, certificates, and support.
How do you configure program settings and rename roles?
Program Settings holds the structural choices for your program: Program Info (name, description, cover photo), New User On Boarding (the welcome wizard steps for mentors, mentees, and admins), Meeting Creation (who can create meetings, lead time, weekly limits), and Privacy (who can see profile details and who can message whom).
Role renaming lives in a different place: on the Users page, open the Role Naming tab. Here you choose what mentors, mentees, groups, and suites are called throughout the program, from coach and coachee to consultant and entrepreneur, among other options. Saving a new set of labels reloads the page with the new terms in place. This is cosmetic: the underlying settings, matching rules, and data are unaffected by whichever labels you pick.
If your program needs published agreements, use Program Settings → New User On Boarding → Agreements. Publish an agreement, decide whether existing members must re-accept it, and track acceptance with “Accepted” and “Awaiting acceptance” counts plus a reminder button.
How do you invite, approve, and import mentors and mentees?
The Users page is the hub for people, with tabs for Mentors, Mentees, Groups (if used), Coordinators (if matching is on), Applications, Admins, and Role Naming.
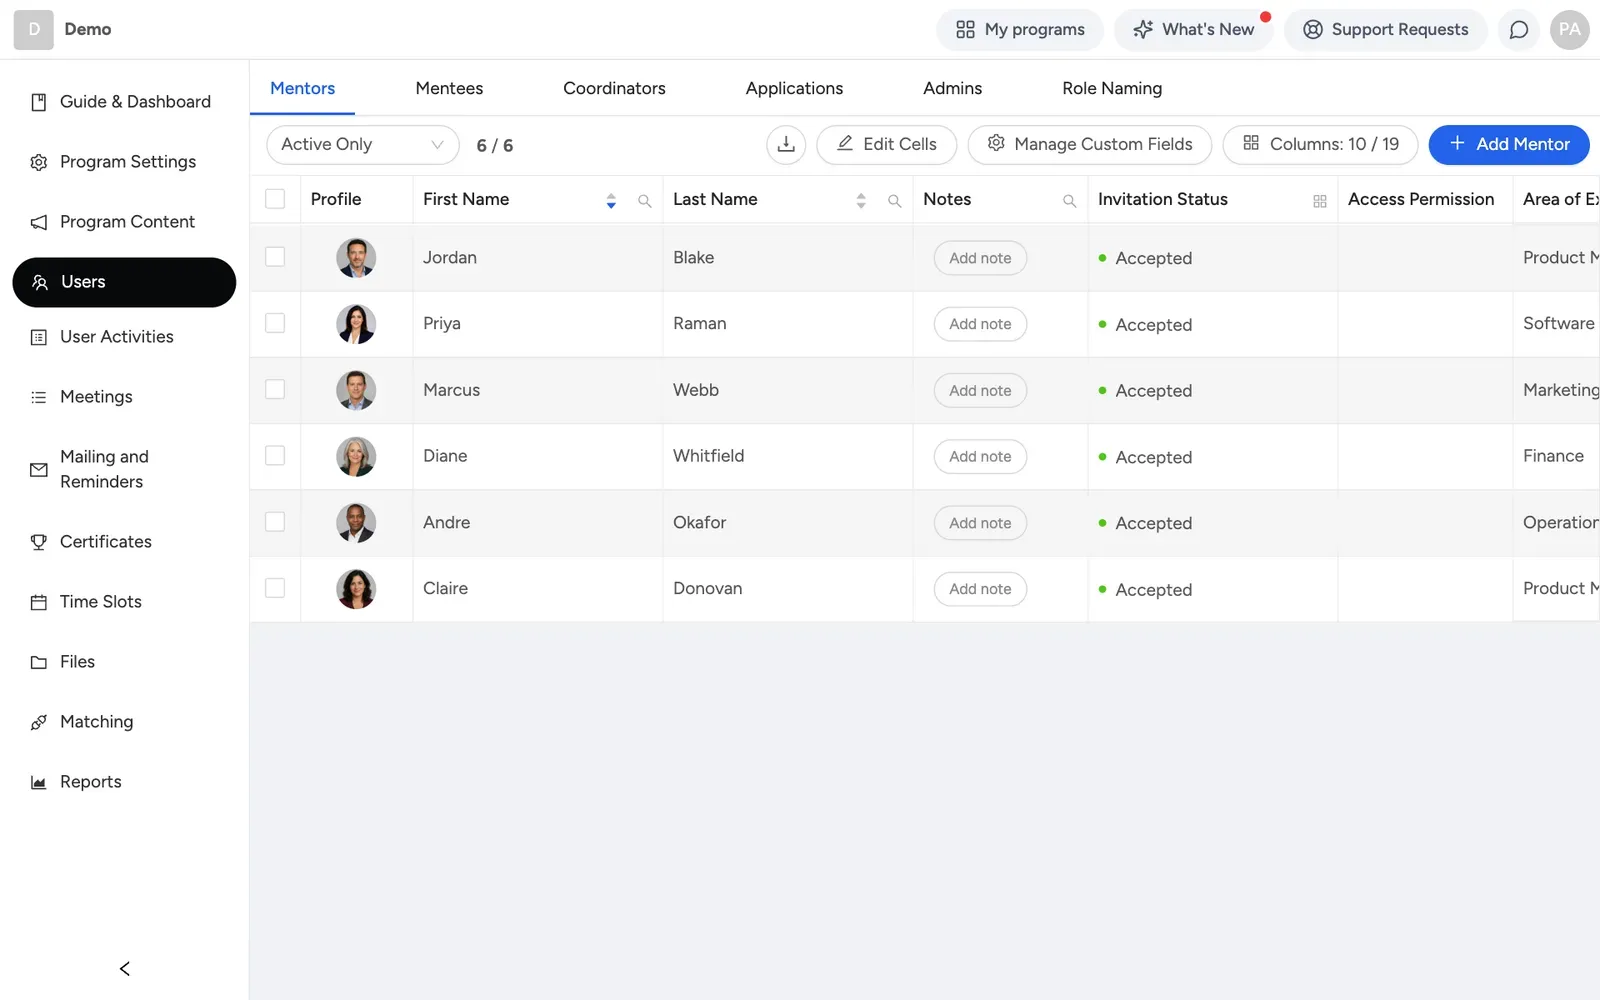 To add people one at a time or in bulk:
- Open Users → Mentors or Mentees, and click Add Mentor or Add Mentee.
- The dialog’s first step asks whether you are adding a single person or uploading a file. Choose either path from there.
- For a file upload, download the sample Excel or CSV file from the same dialog, fill in email, first name, last name, and any custom fields your program defines, then upload it.
- The invitation checkbox is on by default, so people are invited as soon as they are added. Untick it if you want to invite them later.
Each person’s row shows an invitation state: Not invited, Invited, or Registered. Resend an invitation or copy the invitation link straight from the table. If someone’s email address was wrong, edit it on their profile page; if they have not yet accepted, resend to the corrected address.
Bulk matching import is a separate flow from bulk user import: it lives under the matching area and expects a file with mentorEmail and menteeEmail columns, used to pre-load existing pairs rather than add new people.
If your program accepts public applications, the Applications tab is where submissions land, in Pending, Approved, or Archived states. Accept & Invite both adds the applicant as a member and sends their invitation. Mentor Application Settings and Mentee Application Settings control whether applications are open with auto-accept, open with manual review, or closed, along with the form’s title, content, and fields, and each has its own shareable link.
Custom profile fields (such as text, number, single choice, multiple choice, and rating stars) are defined separately for mentors, mentees, and groups from the Users page gear icon. These feed both the application form and, if your program has matching, the matching rules.
How does matching work, and how do you set it up?
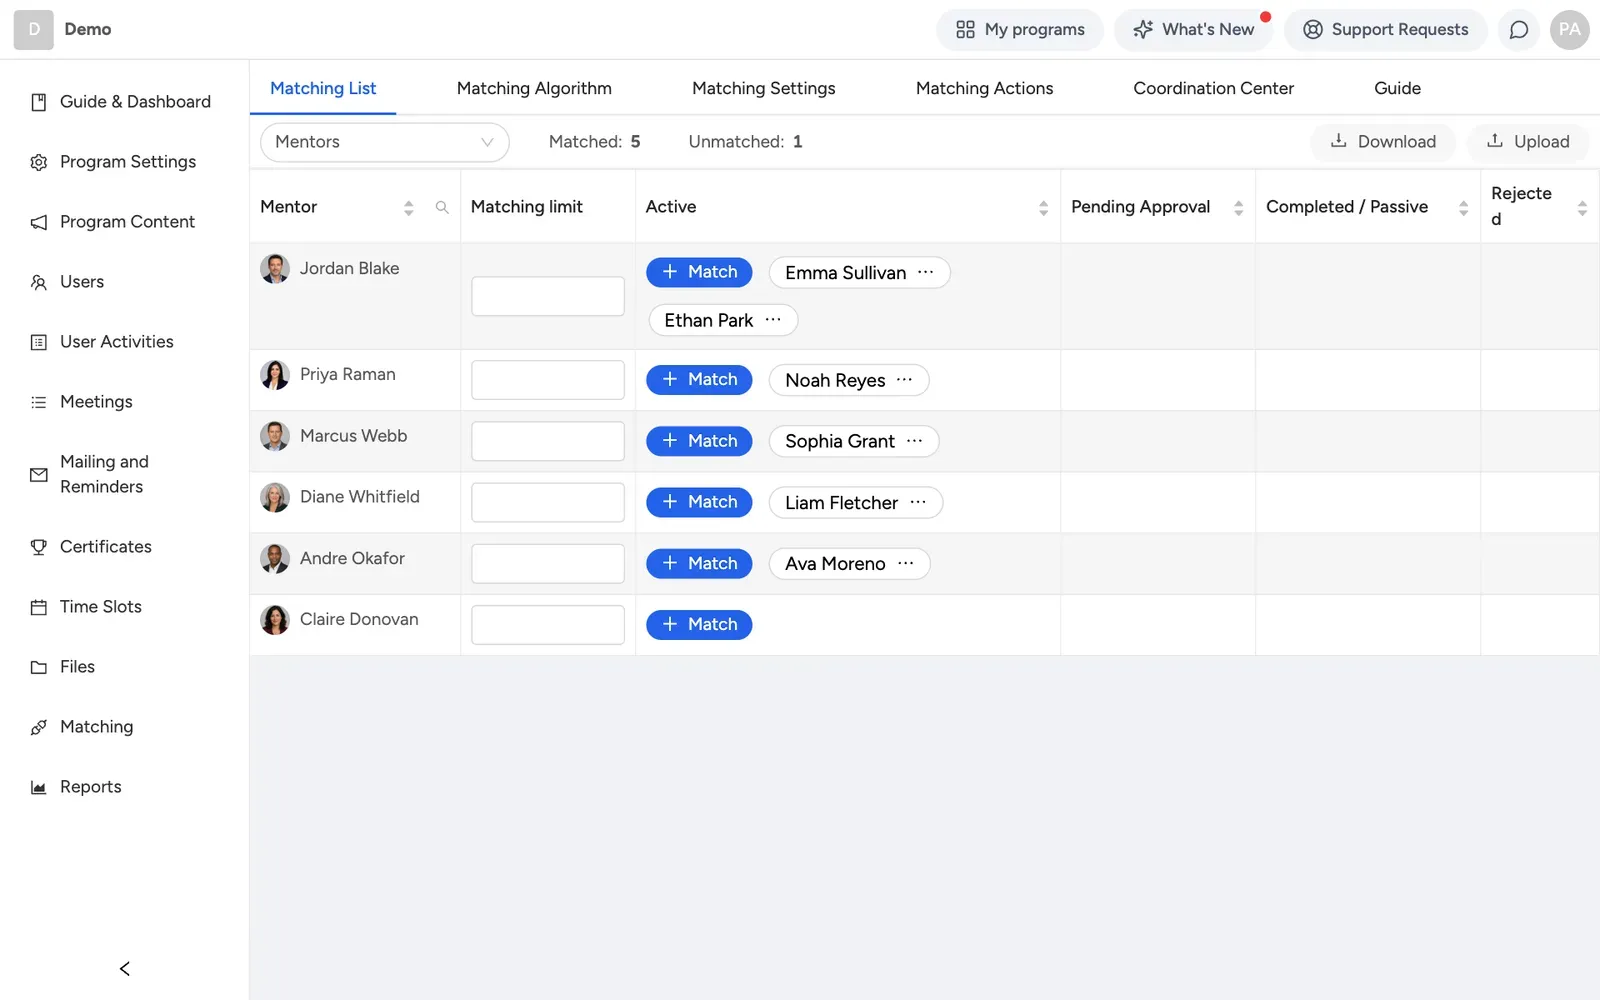
Not every program has matching. Some run as a pool, where mentees book time with any mentor’s open availability directly, with no formal pairing step. If your program does have matching, the Matching area appears in the left navigation with several tabs: Matching List, Matching Algorithm, Matching Settings, Matching Actions, Guide, and Coordination Center.
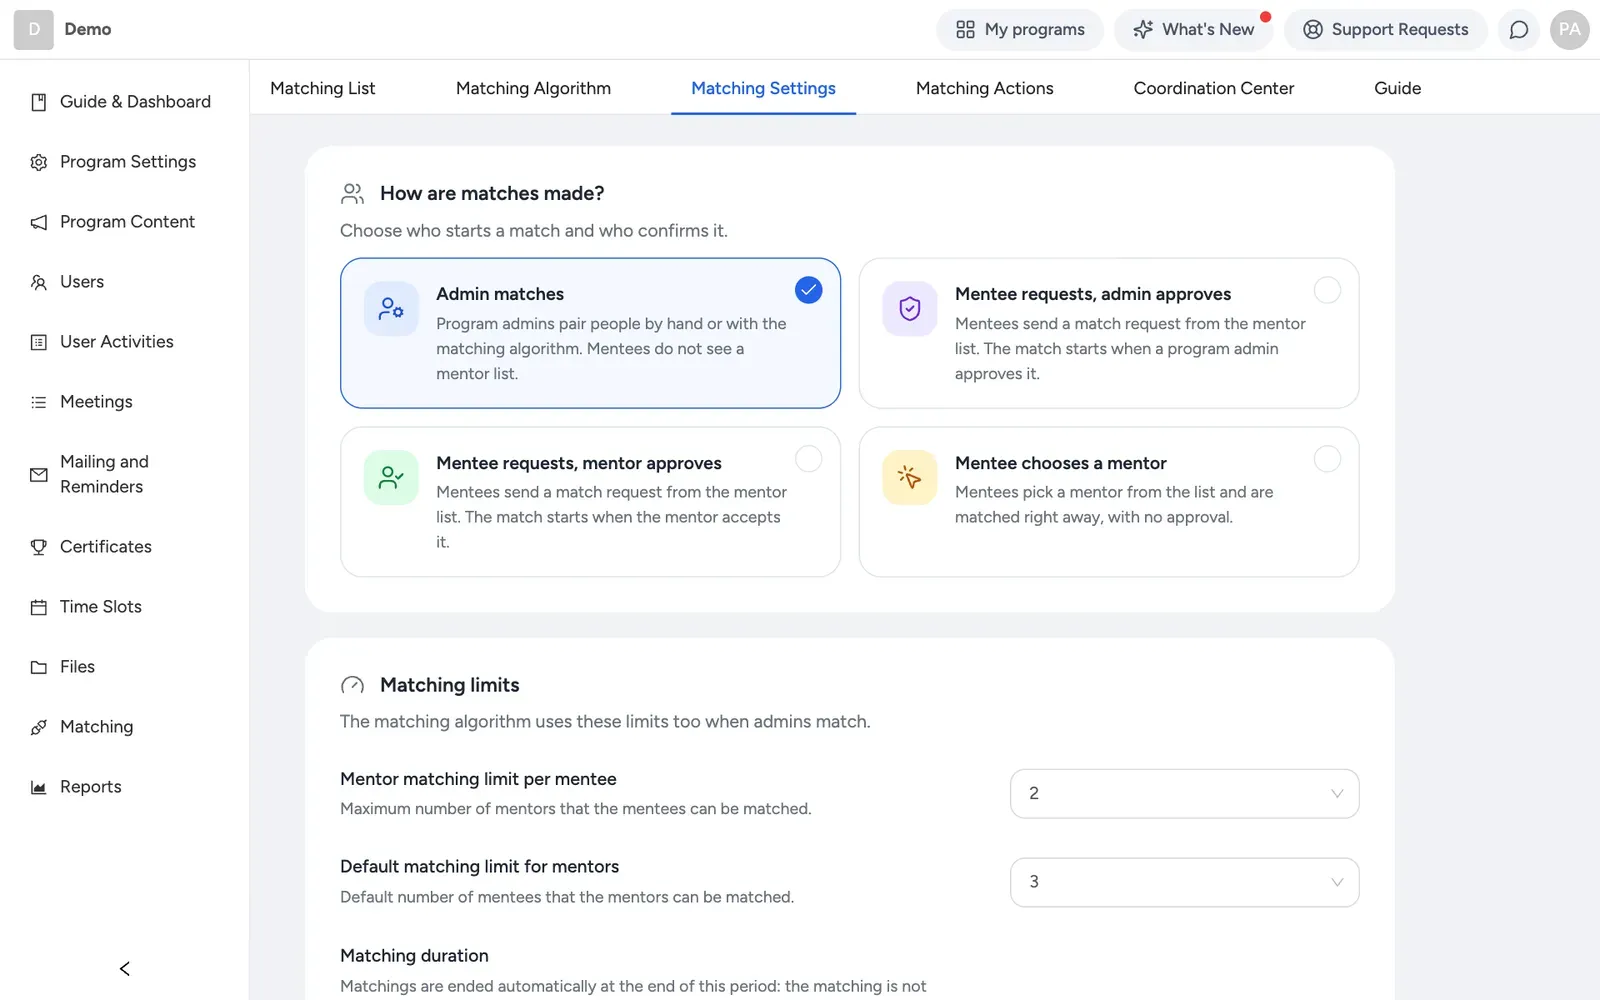 Matching Settings is where you choose the matching mode:
- Admin matches: you pair people by hand or with the matching algorithm, and mentees do not see a mentor list.
- Mentee requests, admin approves: mentees send a match request from the mentor list, and the match starts when a program admin approves it.
- Mentee requests, mentor approves: mentees send a match request from the mentor list, and the match starts when the mentor accepts it.
- Mentee chooses a mentor: mentees pick a mentor from the list and are matched right away, with no approval.
The same page also holds the mentor selection list settings (which mentors appear, how many requests a mentee can have waiting), matching limits (how many matches a mentee or mentor can have, and an optional matching duration after which matches are marked completed), and a Matching Notifications toggle that emails both sides when a match is created.
To create matches, use the Match button on Matching List for one pair at a time, or go to Matching Algorithm, click Calculate, and review proposed pairs before approving them individually or all at once. Every match action is recorded on Matching Actions.
The algorithm scores each possible pair by comparing profile fields against the rules you define, each with its own weight: the score is the weight of matched rules divided by the weight of all rules, times 100. A pair that fails a rule marked as required is excluded entirely rather than scored low, and a pair scoring 0% is never assigned automatically. Given the same data, the algorithm always produces the same result.
Coordination Center gives you a single table of active matches and their meeting progress. Admins who are set up as coordinators only (not full admins) land here directly and see no other matching tab.
 For group programs without matching, you can also set tag-based meeting rules: create group tags, assign them to groups, then set which tags each mentor expects or will not accept for meetings. A program-wide version of the same rule is available too.
One important note: the matching mode controls how an already-matched program starts and approves pairs. It does not switch a program between matched and pool, or between individual and group members; that core shape is fixed when the program is created. See Mentoring program models for the full picture.
How do you define sessions and the session plan?
If your program uses a structured session plan, go to Program Content → Sessions and click Add Session to add a title, a date range, separate descriptions and attachments for mentors and mentees, and optional “before the meeting” and “after the meeting” questions. Sessions can be reordered, duplicated, or deleted, and the same page lists scheduled meetings tied to each session plus the responses members have submitted to its forms. Deleting the last remaining session switches the program to the freestyle model, with a warning before you confirm.
If your program has no sessions (a freestyle program), the Sessions tab is replaced by Meeting Feedback under Program Content. Edit the per-role questions on its Feedback Questions tab and read the answers on the Feedback Responses tab.
How do you manage meetings and availability?
The Meetings page lists every scheduled meeting across the program. Each meeting holds date, time, and location (in-platform video, Jitsi Meet, Zoom, Google Meet, Microsoft Teams, or a custom address), the participant list with a message shortcut, Meeting Notes visible to all guests and admins, and Hidden Notes visible only to the author and admins.
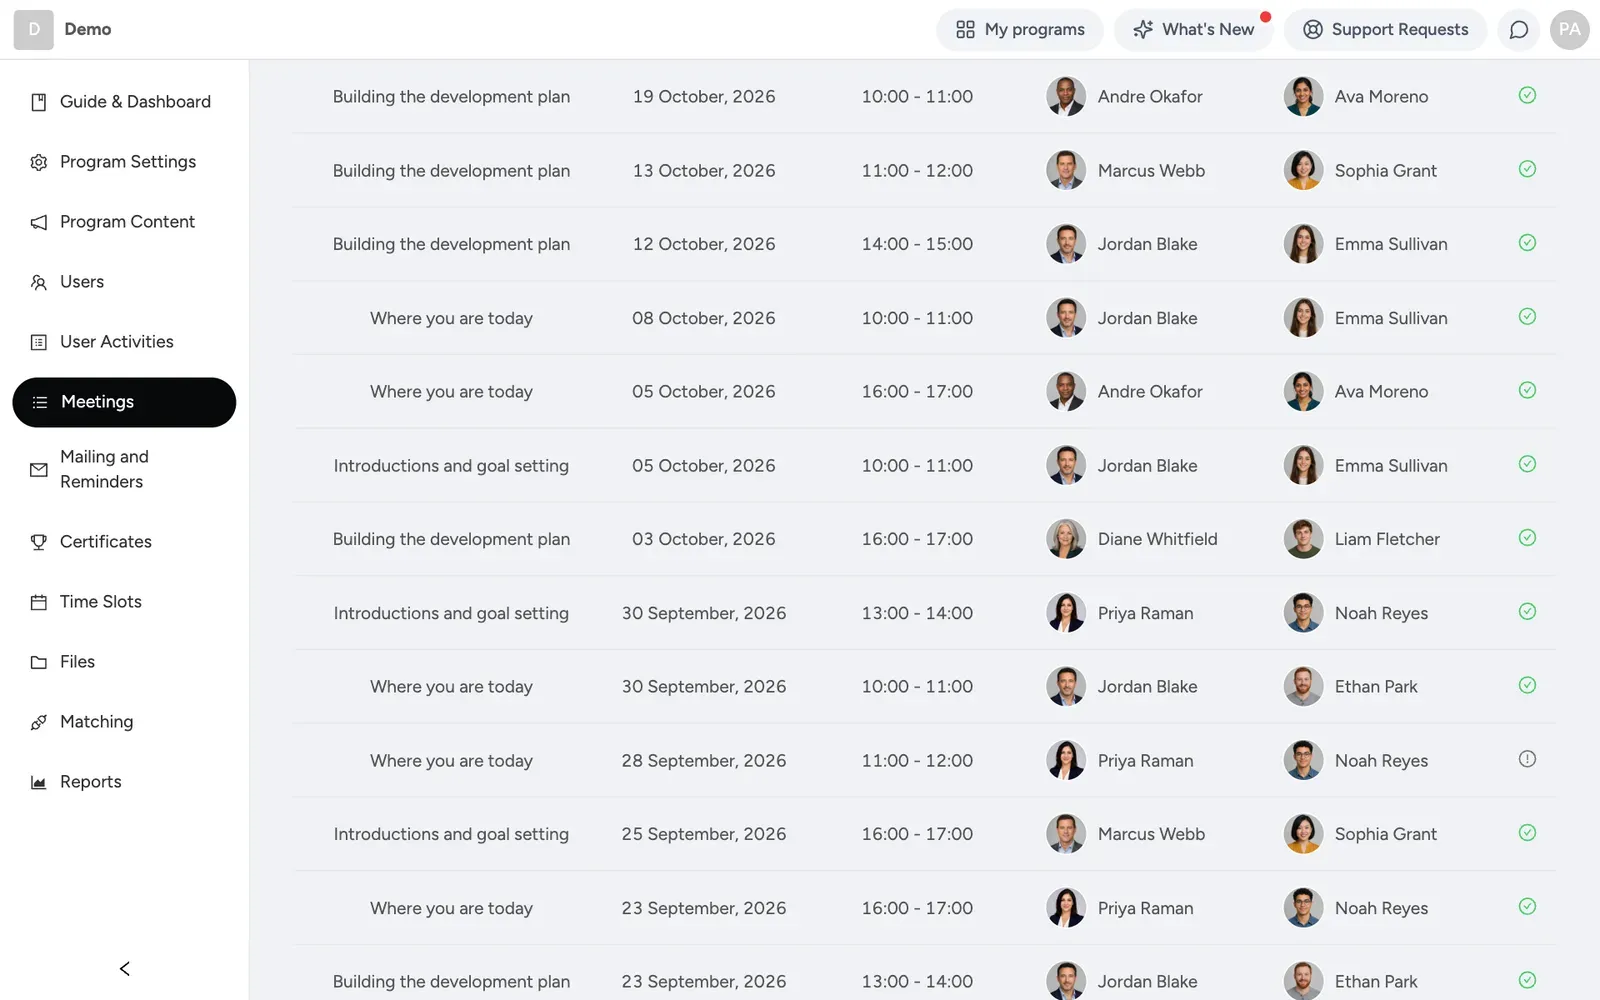 Meetings can be created directly by mentors or mentees if your program allows it, or through availability: a mentor publishes open slots (which can repeat weekly), and a mentee books one. Program-wide settings control the weekly meeting limit per mentee, how far ahead a meeting must be created, and how close to the start time a mentee can still cancel; mentors can generally cancel at any time. As an admin, you can create a meeting on behalf of any member from their profile page, and open, update, or cancel any meeting from the Meetings list.
The Time Slots page lists mentors as cards showing their published availability, with a link to open their profile or send a message. There is no separate nav item called “Calendar”; this screen is named Time Slots.
In-platform video and Jitsi Meet need no setup. Zoom, Google Meet, and Microsoft Teams become selectable once a member connects their own account under their personal settings.
How do you publish posts, forms, and tasks?
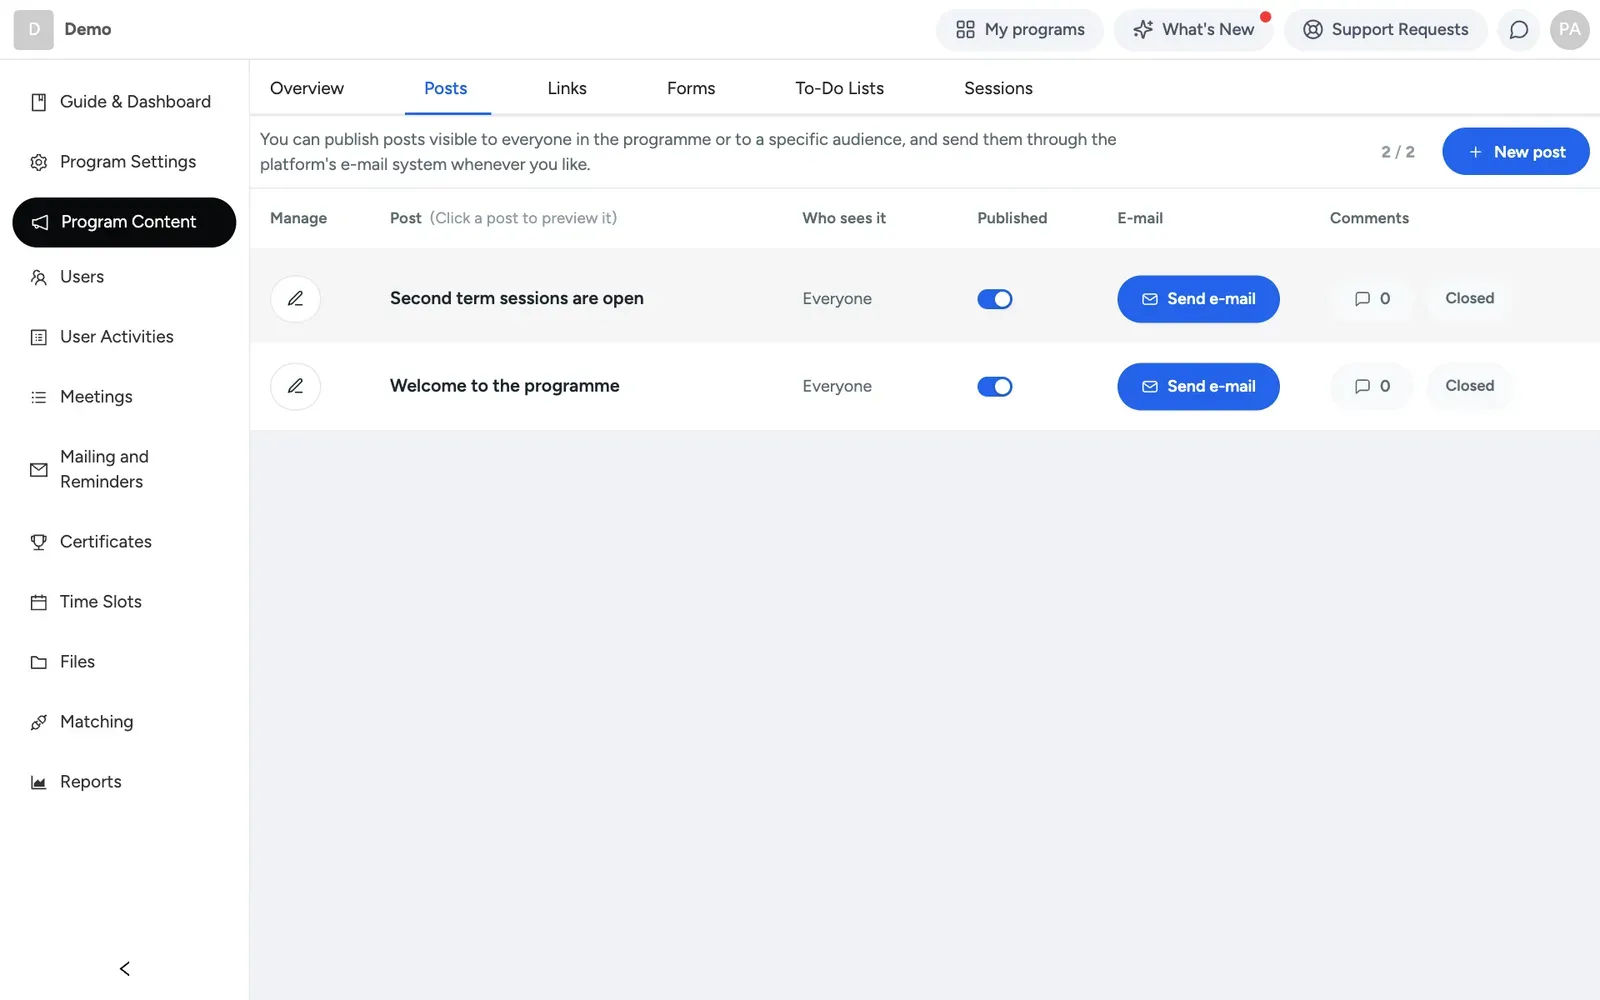
Program Content covers posts, links, forms, and to-do lists. To create a post, open Program Content → Posts, click New post, write a title and body, choose the audience (everyone, mentees only, or mentors only), set it to published or draft, and optionally check “also send as email.” Posts appear in the Announcements area of the member home page. Comments are closed by default; if your program has comment policies enabled, set each post to Closed, Open, Moderated, or Admin-only individually.
 General Forms (under Program Content → Forms) let you create a standalone form targeted at everyone, mentees, or mentors and publish it, or assign a single form to one person. If your program has matching, Matching Feedback Forms appear automatically when a match completes, one per role, filled out separately for each match a member has.
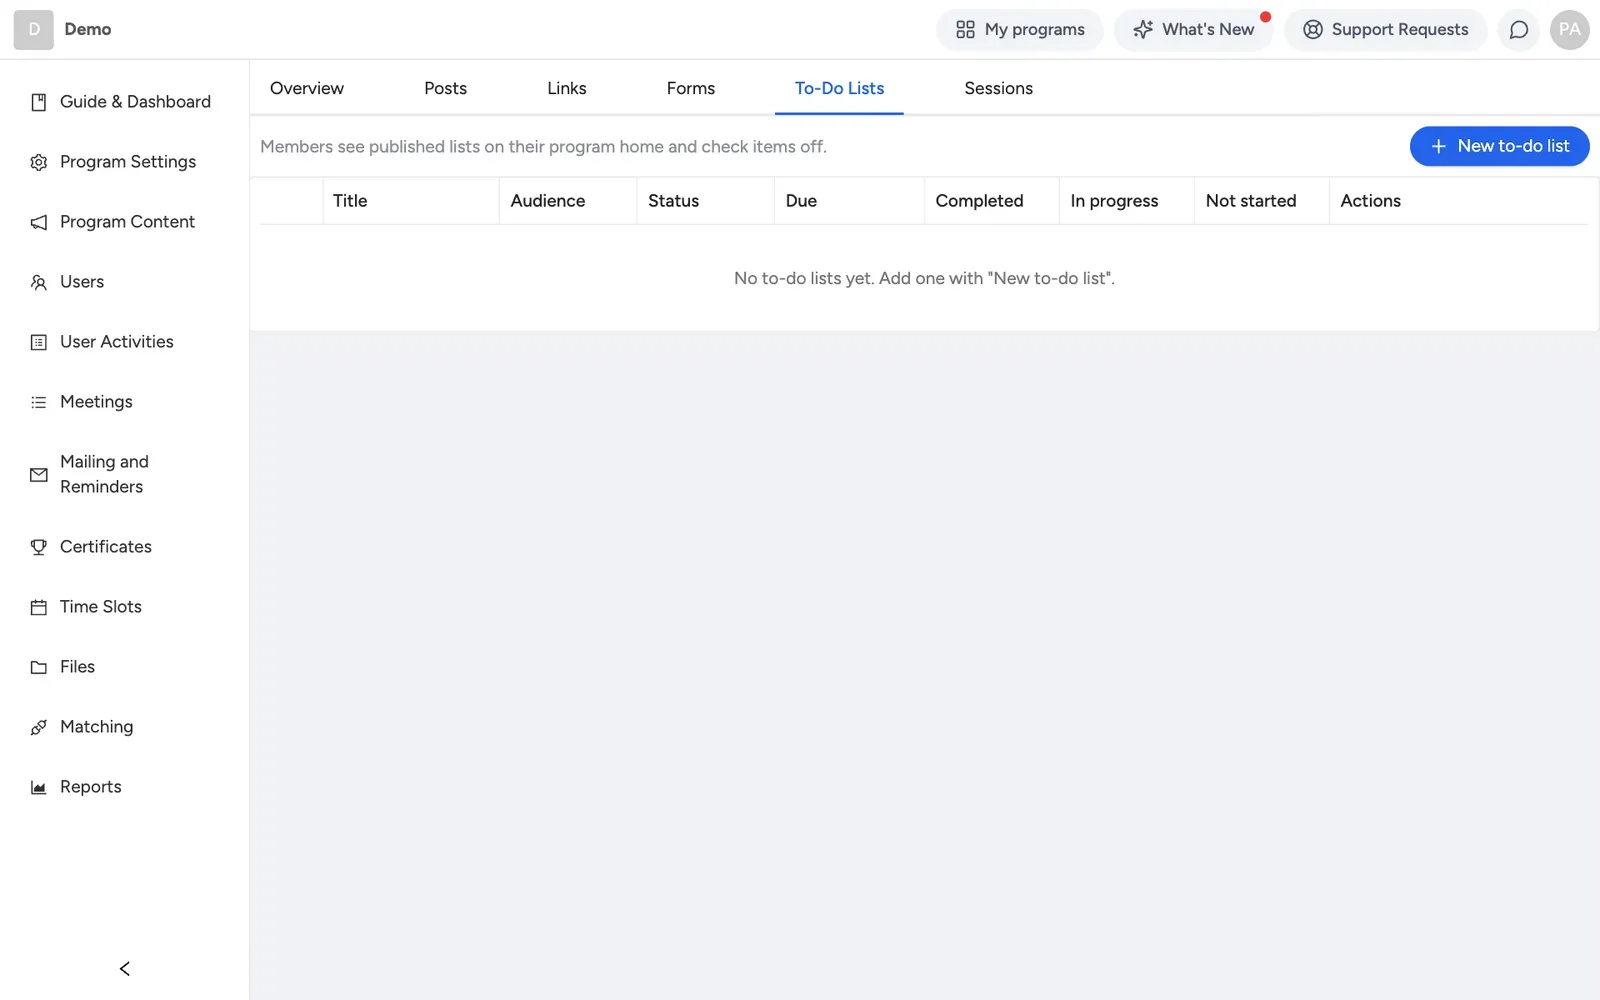
To-do lists live under Program Content → To-Do Lists. Create a checklist with a title, a description, and up to 50 items, aimed at everyone, mentors only, or mentees only, and publish it or leave it as a draft (drafts are visible only to admins as a preview). Each member’s progress shows as completed, in progress, or not started. Due dates are optional and purely informational, with no automatic reminder attached; adding a new item to a published list moves anyone who had completed it back to in progress.
How do you message members as an admin?
Messaging permissions for members are configured in the Messaging section of Program Settings → Privacy, with options ranging from matches-only to everyone. As an admin, you message a member by opening their profile and using the Send Message button. The message runs under the program’s name, and every admin shares the same inbox and thread, so a reply from one admin is visible to the rest.
How do you track reports, analytics, and Program Health?
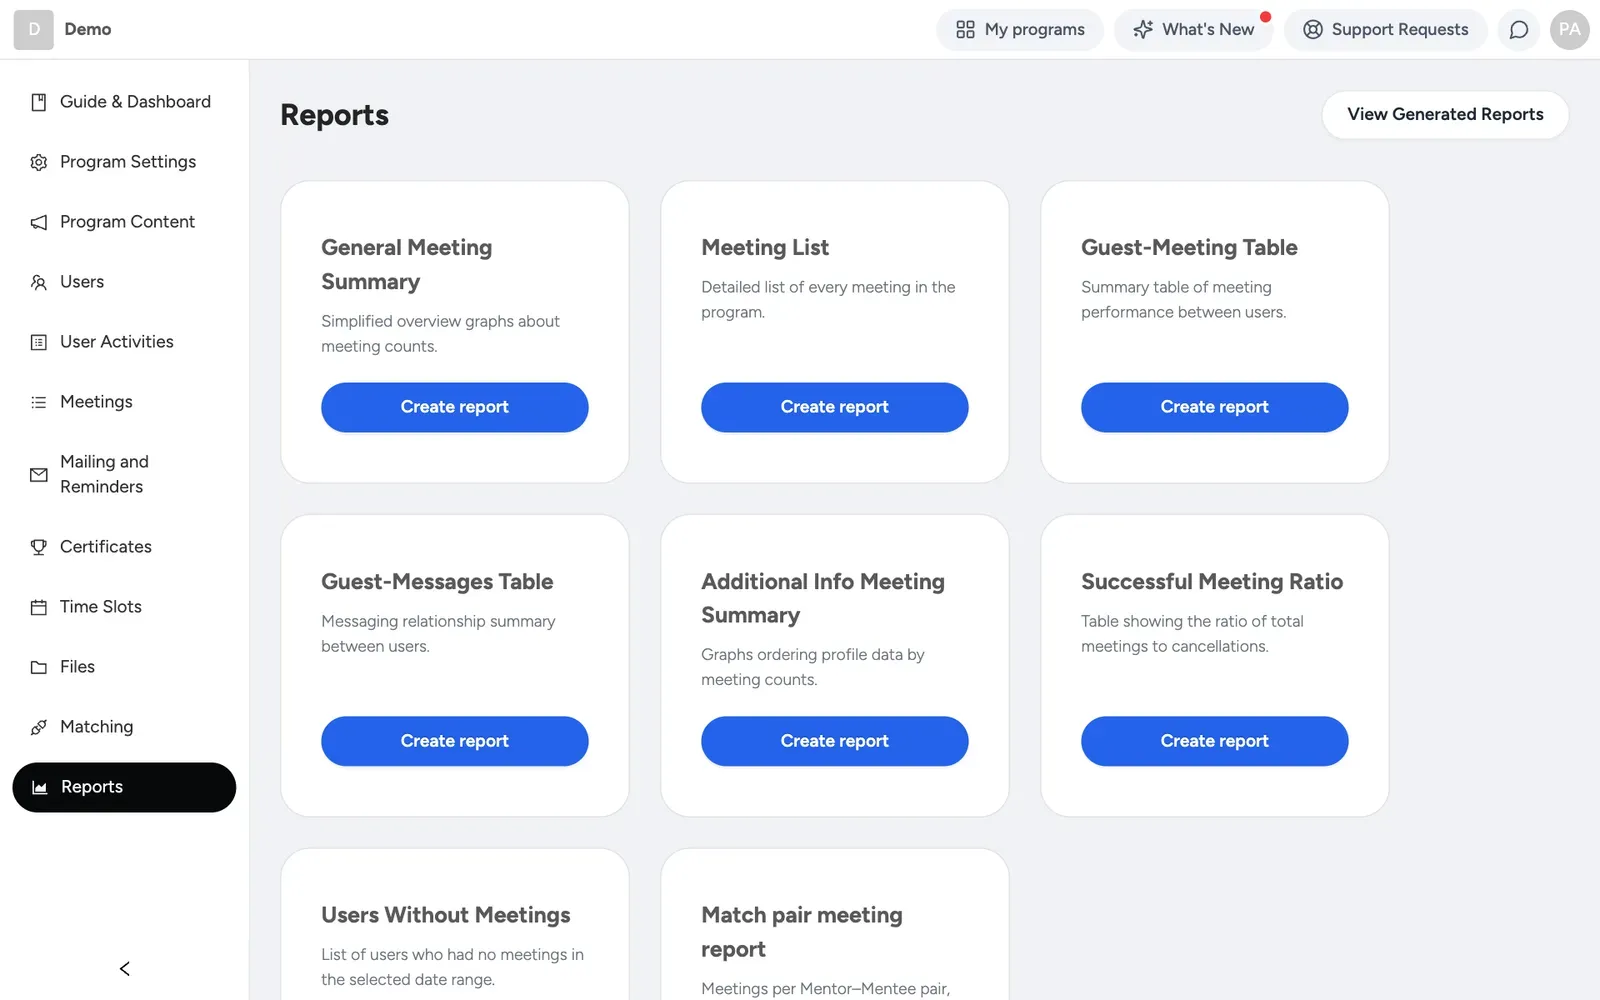
The Reports page generates downloadable reports: General Meeting Summary, Meeting List, Guest-Meeting Table, Guest-Messages Table, Successful Meeting Ratio, Users Without Meetings, and, if your program has matching, a Match pair meeting report. Pick a type, click Create report, choose a date range and, where asked, a user type, and click Generate Report. The report is prepared in the background and you get an email when it is ready; download it as CSV or XLSX from View Generated Reports, or preview it as tables and charts and save that view as a PDF.
 Separately, the home page has a Program analytics block (matches-per-mentor histogram, scheduling activity per session, meeting-form response rate) that needs no report generation, and a Program Health score from 0 to 100 with a band (Healthy, Needs attention, At risk, or an early/late-stage state for brand-new or finished cohorts). The score is built from signals including activation, login activity, coverage, time to first meeting, ongoing momentum, stalled pairs, and cancellation rate, with top advisory suggestions and a drill-down into matches with no meeting for 60 or more days.
How do you issue certificates?
On the Certificates page, set eligibility rules per role: for a structured program, sessions plus forms; for a freestyle program, a minimum number of meetings plus feedback responses. The Who qualifies tab shows each person’s current status against those rules.
Meeting every requirement does not issue a certificate automatically; it only changes a person’s eligibility status. You publish certificates yourself, either one at a time or for everyone who currently qualifies. Once published, a certificate is emailed to the recipient with a public verification page and share buttons, and the Appearance tab sets the certificate’s logo.
How do you handle support requests?
Members submit requests through the in-app Guide & Support Center, built into their own view of the program. Requests appear on the Support Requests board with Pending, In progress, and Completed columns, plus a Software Developer Team column for technical issues you escalate to the Mentornity team.
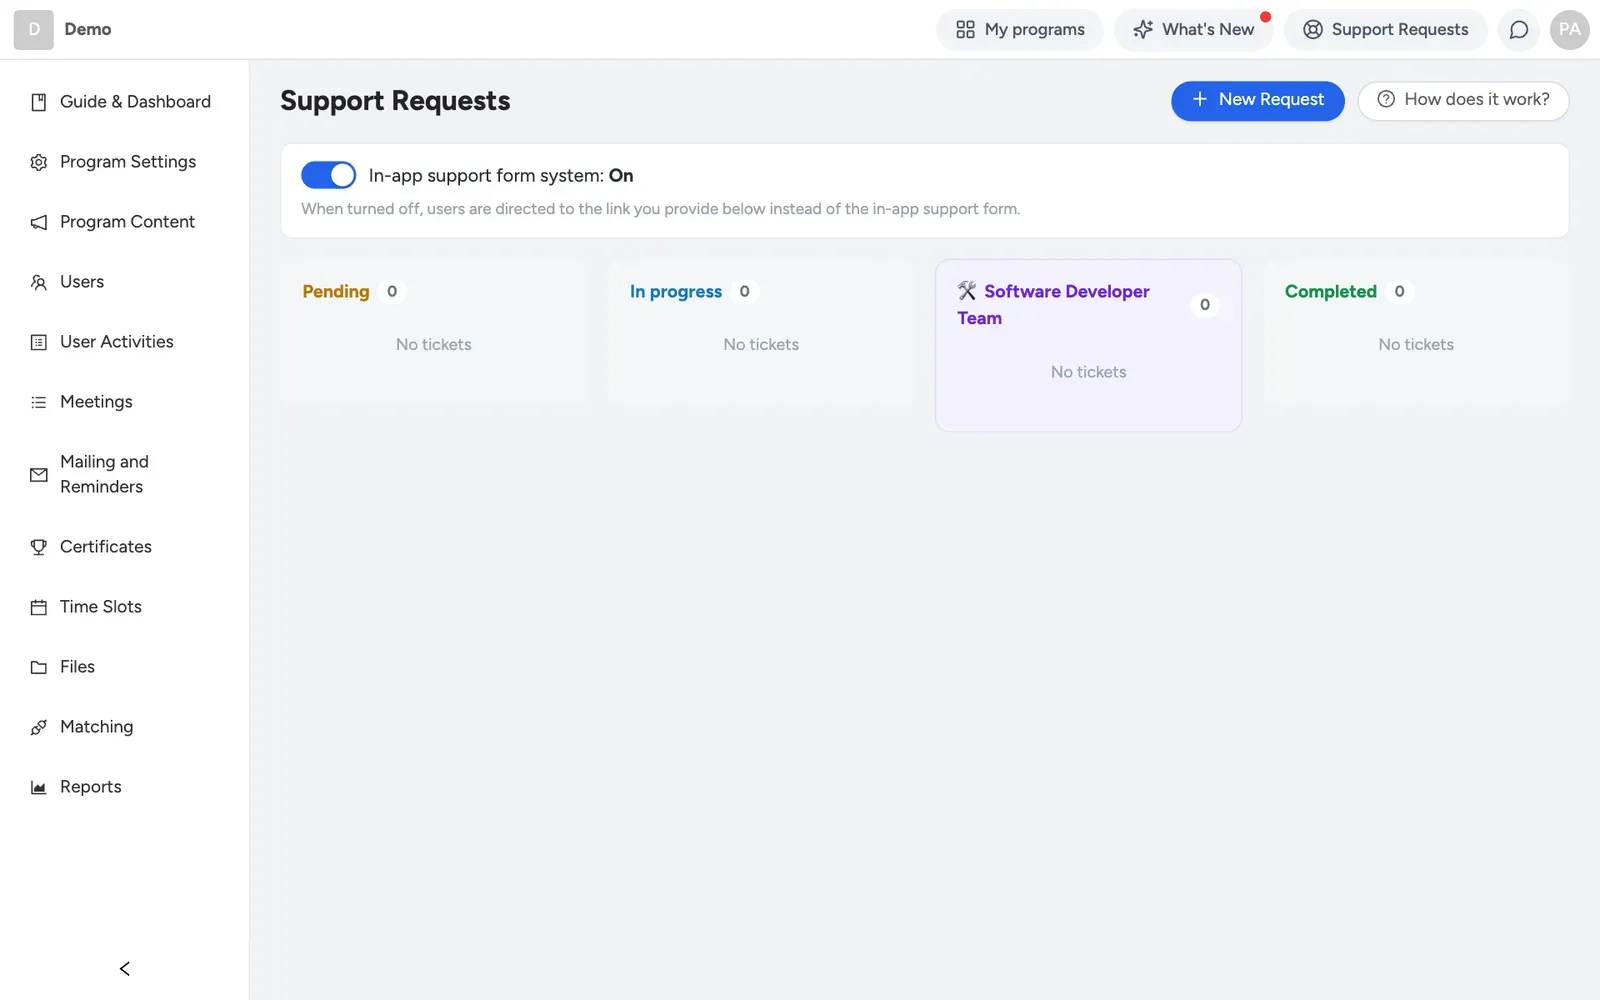 Every admin on the program sees and can answer the same board; requests are not assigned to a single person, and new requests and member replies are emailed to all admins. Your replies reach the member under the program name. Members can attach files in both directions, and admins can attach up to 5 files on a reply. If you would rather members use an external support system, turn off the in-app form and point members to an external URL instead, from the same settings area.
How does this guide change depending on your program’s setup?
Everything above describes the admin panel as it exists for any program, but which sections actually apply depends on how your program was set up:
- Matched vs. pool. A matched program uses the full Matching area: settings, algorithm, actions, Coordination Center. A pool program skips formal matching and shows no Matching item; mentees book time directly from a mentor’s availability.
- Structured vs. freestyle. A structured program uses the Sessions page and session-bound forms. A freestyle program has no sessions; feedback questions live under Program Content → Meeting Feedback instead, and meetings are created as needed.
- Group programs. Group mentees add a Groups tab on Users, group-level profile fields, and (for group programs without matching) tag-based meeting rules per mentor. “Entrepreneur” or “startup” programs are a label choice under Role Naming, not a different product.
None of these are settings you flip after launch; they are chosen when the program is created, so if your setup does not match what you need, reach out to the Mentornity team rather than hunting for a toggle. For the full comparison of these models, read Mentoring program models. For the member-facing side, see the mentor guide and mentee guide. For video setup, see video meetings in Mentornity; for SSO or white-label branding, both set up by the Mentornity team rather than self-serve, see SSO and white label.